Monday, September 8, 2008
Addicting New Flickr Tool
http://symmetry.sytes.org/
This little application pulls flickr photos by tag and morphs them into sometimes beautiful and sometimes freakish images using some type of mirroring algorythm. It's pretty addicting when you are tired and bored.
Have fun!
Sunday, July 13, 2008
Learn Photoshop Online
There are classes offered at any self respecting art or vocational school and most community collages, but they can be pricey and time consuming. There is a lot you can learn from library books and online resources for free. I just added a resource on this blog offering some tips on PS that you might find helpful. Please check it out in the side bar.
Friday, July 4, 2008
SEEKING THE RAINBOW - A New Fine Art Print Released Yesterday
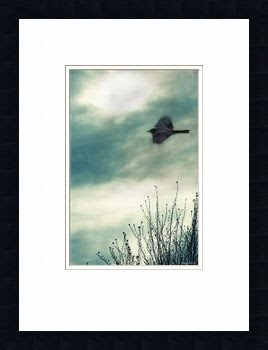 Hello, I have just released a new art print today called "SEEKING THE RAINBOW". It is a digital painting made from 2 of my photographs worked together in Photoshop CS3. It is available as a fine art print with or without custom framing in my ImageKind Gallery (under my photography name "Kamera Kat").
 (Note - It's difficult to see the rain in this small image. You can zoom in on the print on the ImageKind site.)
I would love to hear what you see in the picture. Leave a comment! =o)
This is what I see... When the storms of life rain down, delight in the promise of finding a new rainbow at the storms edge. Then, realizing that the rainbow did not exist until this storm created it, we can be thankful for the storm even while we are still in it.
"And God said, "...Whenever I bring clouds over the earth and the rainbow appears in the clouds, I will remember my covenant between me and you and all living creatures of every kind. Never again will the waters become a flood to destroy all life." Gen. 9:14
Sunday, June 29, 2008
Free Publicity for my photography & art! I'll take it!
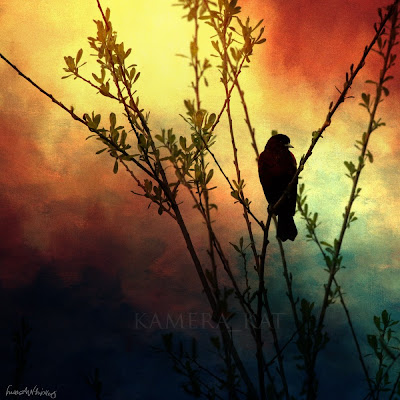
 Well this post is about 1 month overdue, but I'm posting it anyway because I am exicted. A fellow ImageKind member emailed to tell me that a daily art review blog called "Art Sweet" featured me as the artist of the day May 26, 2008. What a nice surprise!
Quote: "Today’s featured artist is Lisa Whipkey. Lisa is a wonderful multimedia artist. Her use of color, texture and layering is simply fantastic! My favorites are “Love Grows”, “Opium” and “Venice Vase”. - ArtSweet"
I have been blessed to have my work featured on many blogs in the last couple of years (love that free publicity!) and I have had a few kind art reviews too, but I am always excited every time I am ego surfing (google myself) and find that someone liked my work enough to give it some special attention. I believe every artists work speaks to someone and we all like that affirmation that someone out there "gets" what we do. So thanks Art Sweet for making my day!
Sunday, June 22, 2008
My Pix published on iPhone...Cool
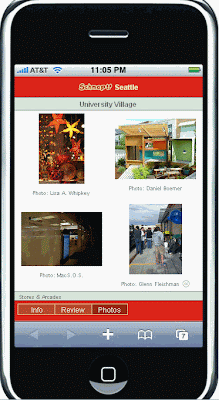
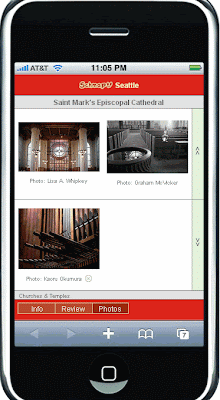 A while back a company called Schmap - Beyond the map" contacted me for permission to use two of my Seattle area photos on their website which is a electronic map of the whole country where you can select maps down to the neighborhood level and view the shops, sites, shopping, etc. before you ever get there.
I just received notice that they are now using my pix on the new Schmap Mobile for iPhone. This is what it looks like... The U village shot and the St. Marks Cathedral shot in the upper left of the images are mine. Click to enlarge. Kinda cool I think!
Wednesday, April 16, 2008
Photographing Small Products for Your Online Store
If you have ever shopped online, then you probably know the necessity and value of good product photos. It's a documented fact that items without photos rarely sell, and those with great photos FAR outsell those with average ones. I know personally, the photo is a make-or-break factor for me when I am shopping online. Now that I am on the other side as a shopkeeper, I want to make sure my pictures are as good as I can make them.
Though I have been a photographer for a while, product photography (also called table top photgraphy) is new to me. You might think "If you are a photographer, then you are a photographer.", but good product photography is it's own unique 'animal'. As a fine art photographer, my personal photography goal is to evoke a mood. I will even say that I try to create a bit of fantasy, frequently using soft focus, blur, antiquing, etc. I like to show the subject not as it is, but as I see it. Product photography is the opposite of that. With product photography, my goal is to sharply and accurately depict the subject for the buyer. The picture itself is not what they are buying. The product I am selling must be the center of attention. That said, I don't want an unappealing, boring, generic photo either, so my approach is to enhance the picture by adding props, background color and interesting light.
There are several successful styles of product photography for sure, but one rule they all have in common is good lighting. It is the #1 most important thing! Natural daylight or lights that mimic daylight are typically best. Some other general rules are...
- Avoid blur/shake - Use a fast shutter speed with lots of light or a tripod and carefully focus.
- Get close and fill the frame with the subject. It does not good to provide a photo if the subject is too small to show detail.
- Provide visual clues to show scale if possible. I photograph subjects next to US quarters especially for this purpose.
- Show multiple angles.
- Avoid harsh shadows and reflections. Don't use on-camera flash. It will just make an ugly flare.
- Dust and clean the products. Dust and fingerprints will show in well lit, close ups, so polish away!
TableTopStudio
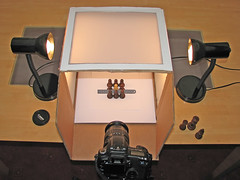
The simplest ways to instantly improve your small product photography is to invest in a light tent kit (or make your own- google "making a light tent"). Mine was $99 and included 2 tents (small & med), 2 cool & bright white lights on stands, white & black seamless backdrops, white and black acrylic shiny product tables in a wheeled case. How does a kit improve pics? Well...
- The light tent diffuses the light so harsh shadows are minimized
- The shiny product tables show appealing reflections of the product. This looks professional and it is a common style seen in magazines.
- The seamless backdrops make the product appear to be floating and definitely makes them the focal point. It also provides a blank surrounding so shiny products do not reflect objects and colors.
- The white light accurately depicts colors and mimics full spectrum daylight which is naturally appealing to most people.

I use my light tent kit for every product photo, but I typically do add color backgrounds to mine as I want the thumbnails to pop off the page of the white website where they are posted. You can buy cloth made specifically for photography backgrounds or use paper, fabric, a place mat or whatever you think would look nice with the product and make it appealing to your target buyer. I also add props to enhance the photo, but mostly to hold up the jewelry. You can also use museum wax or putty to hold things upright too. For lightweight items, you can use fish line to suspend it from the top of the light box.
Here's some samples of how backgrounds & props can be used:
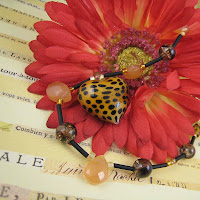

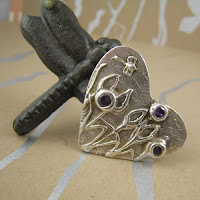
The best way to learn is to look around at some online auctions and stores and pay attention to which photos really grab your attention and look professional, then try to mimic the look yourself.
Sunday, March 23, 2008
The Power of a Picture - Photo Contest - Human Impact on the Environment
If you agree, please vote for me by April 8, 2008!!! Click on the pic to vote. Thanks!!
Tuesday, March 18, 2008
Mark of the Beast Cameras & Me, the Commuter

Sometimes I forget that there are other people around me until I look in my review mirror and find the person behind me is laughing at me or glaring. I recently started thinking in my paranoid mind that all this casual snapping might be drawing attention from other than my fellow commuters. I mean, who's to say who controls those "traffic cams" really. In my circle, we refer to them as "Orwell Cams" or "Mark of the Beast" cams. Que the suspenseful music... dun, dun duuuuuun.

Now, if I was in London, I would DEFINITELY be on Scotland Yard's list of shame & suspicion. Have you seen what is going on over there with the anti-photography stuff? Scary! Do we or do we not have freedom any more? Geesh!
Please read these articles about the anti-terrorism steps that involve asking citizens to turn in people taking pictures around London.
CRAVE Article London Police Target Photographers
Gardian UK Article Time to Fight Security Superstition
 Hello? Tourist take pictures. Duh! OK, I really do understand both sides of the issue actually. I know that times are scary and it's hard to know what to do to protect us. I just know that if we give up our freedoms, the terrorists have succeeded.
 Monday, March 17, 2008
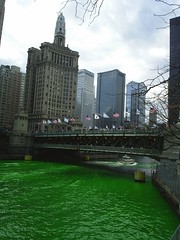
Happy St. Patricks Day... The photography-o-the-green
Saturday, March 15, 2008
A Shooting at Long Beach (with a Camera)
I found this video interesting because I live in Seattle which is a major US port and my husband and I frequently talk about how fun it would be to take photos of the colorful containers, trains, tracks, large orange cranes and huge ships, but we do not even attempt it because we have heard that security is tight due to national security concerns and that photography is a big "red Flag" that is sure to bring you unwanted armed attention. We have heard stories of people having their cameras confiscated, which is not legal, but you can't really fight it when you are standing there surrounded by men instructing a German Sheppard to sniff you from head to toe. There are many, many articles and debates out there about the legalities of this, but that is a huge topic all to it's own so let's save that for another day.
This video shows how a reporter and photographer were able to take photos in a supposedly restricted area for one hour without being approached. As a photographer I think it is cool. As an American, that scares me. Hopefully they were under surveillance and just did not know it.
Wednesday, March 12, 2008
Can't Wait to Shoot with the New Baby!
But now I have a new distraction that might steal me away from all of this geeky bloggy/web mastery stuff....
My New Baby is Coming Soon!!! Yahoo! No, not that kind of baby. I'm talking about my new Canon 40D camera which should be arriving soon. Nothing can distract me from what I should be doing like a new toy! I can hardly wait to play!
I currently have a Rebel XTi (400D) which is an entry level DSLR. I think I am ready to move up to the next level which is a "Prosumer" level. There are features like the live preview, larger LCD, Spot Metering, improved noise handling and 6 fps burst mode that I am really looking forward to. Plus, it is just built better overall with some water seals that the XTi does not have. The 40D is quite a bit larger than the XTi. I was worried that it would be too bulky, but once I held it in my hands, I realized that it is so much better balanced and has a larger grip, that it is much, much easier to hold and therefore in one way feels less clumsy.
I am excited. I'll post some pics as soon as I have a chance to try it out!!!
Thursday, March 6, 2008
How to Take Better Photos for Scrapbooking, Part 2
FYI - though the focus of the articles is for scrap booking pix, the truth is these tips apply to anyone for all photos for pretty much any situation, whether the photo will be scrap booked or not.
Please review the steps in "Part 1" and then let's pick up where we left off... Here we go!
9. Pay attention to the background. Try to position the subject or your body and the camera so that the background that will show in the picture is not distracting. Try to avoid extra clutter in the picture that could detract from the subject. If you are able to adjust the aperture on your camera, use a very wide aperture (low number) to turn the background into a nice silky blur.
10. Use the flash outdoors when taking people pix. I know in a previous step I said to avoid using the harsh light of the flash, but outdoors the light is dispersed enough so that it just fills in the shadows on nicely. Also, if you are somewhat close to the subject, a flash can stop motion blur. For example, take a pic of a flower blowing in the wind using the flash to freeze the image for a split second.
11. Focus on focus. I know that it seems obvious. Of course you have to focus! Right? But, sometimes we get so excited to capture a picture we don't pay attention to which part of the picture the camera is focused on, then when we see the resulting pics we are disappointed to find that a unimportant part of the photo is tack sharp while the subject is blurry.
12. Be aware of shadows. They can be an interesting feature or ruin a picture. It's cool to capture the elongated shadows of trees & people when the sun is low in the sky. It is usually not cool to have an unintentional shadow covering 1/2 of the subjects face. In situations where there is a partial shadow that cannot be avoided, use the fill-flash (item 10 above)
13. When possible, use leading lines to draw the viewer in to the photo. Lines that start near the lower corner of a picture, continue to the subject or diminish in to the distance help to pull the eye into the photo.
14. Use a tripod, especially when there is low ambient light. The lower the light, the slower the shutter which means if your hand shakes at all the picture will be blurry. Built in anti-shake features found in cameras and lenses help, but there is no substitute for a tripod in low light.
15. Love your camera. Hug it, learn it, keep it clean. After all, it's THE tool required to take good pix, ya know? Learn how and when to use all the settings and features of your camera. Read the manual and play around to see what the settings do. Maintain the camera by keeping it dry and store in a stable temperature. Carry in a padded camera bag. Keep batteries charged and store them outside of the camera if you will not be using it for a while. Protect LCD's with clear protective stick-on covers. Be really careful not to get dust or scratches on the lens. Clean it carefully and often with a cloth or tool designed especially for cleaning lenses. Never clean with tissue, paper towel, etc. All of this is pretty basic, but it is important so worth mentioning.
Here's a few pictures that are good examples of what is covered in this blog and Part 1:
Why it's good: LEADING LINES & OFF CENTER SUBJECT
Why its good: INTERESTING USE OF SELECTIVE FOCUS
Why it's good: UNCLUTTERED BACKGROUND, OFF-CENTER, UNPOSED PICTURE, GOOD SIDE LIGHT
Why it's good: RULE OF THIRDS APPLIED. (Subject is placed at one of the four intersections where the lines meet.)
Why it's good: INTERESTING CROP + FUN COLOR/FILTER APPLIED IN PHOTO EDITOR
Wednesday, March 5, 2008
How To Take Better Photos for Scrapbooking, Part 1
If you are in to scrap booking or thinking about scrapping to do something cool with that giant box-o-pics you have at the bottom of your closet, then you have probably spent some time looking at other peoples scrapbook pages for ideas and inspiration. I'm sure you have admired the colorful papers and embellishments, and journaling, but I am willing to bet that the pages that truly 'grabbed' your heart the most were the ones with one or two quality photos where the photos were the star of the page. Right?
So now let's think about this.... What makes a quality "photo" vs. a snapshot?
Here are some really high-level, simple rules that will immediately improve most photos:
1. Fill the frame with the main subject. Get close or zoom in.
2. Take candid shots instead of rigidly posed shots.
3. Take the photo at a fun angle. Don't take a picture standing with the camera straight on every time. Tilt the camera, hold it high and have the subject look up, hold it low and angle up to the subject. Get down on the ground with kids and pets.
4. Don't force a smile. The most moving images are when the person has a natural expression.
5. Catch mid-giggle pics of kids.
6. Make sure there is lots of natural light. Avoid the harsh light of the flash whenever possible. Daylight with the subject near a window works great or outdoors on overcast days or at sunrise/sunset when the light gives the subject a warm glow.
7. Don't center the subject in every shot. Move the camera so that the main subject is off to one side. Also, don't center horizon lines when taking outdoor shots. Follow the "Rule of Thirds".
8. Use interesting crops to show just a portion of the photo, like maybe the whole body without the head in the frame, or just show the hands or feet.
and more...
Please check back to this blog for photography tips on how to take better photos part 2 coming soon.
Here is an example of some pages found on flickr that I think exemplify some of the tips mentioned above(permission to blog granted by the owners):

Sweet Tender Moments Digital Scrapbook Page by Christine Smith
Originally uploaded by Christine_Smith
The pages above, IMHO, are embellished in a way to bring the photo more attention vs. draw attention from it. The memory is the foremost subject of the page, and that is what tugs at our hearts, makes us smile, or gives us warm fuzzies!
More tips coming soon! Subscribe to get automatic updates!
Yea! My Art is Now Available at Costco.com!
I have had several blessings lately...A few nice write ups from online art critics & bloggers about some of my pictures & a nice corporate art sale. But perhaps my most brag-worthy thing, IMHO, is having Costco.com select a piece to sell on their website, and possibly, stores later.
A few months ago I was approached with the idea of possibly offering one of my pieces on their site along with a few other artists works. I was, of course, flattered and thrilled at the idea of a large volume of people seeing something I created & possibly purchasing it. I was told that Costco's online sales are nearly equal to that of their stores, so there is potential for a large audience. I'm very excited!
"Placidity" is now available at Costco.com with custom framing options. TAKE ME THERE!
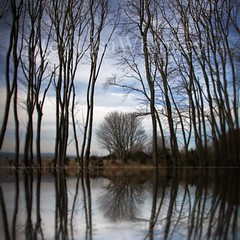
If you like this piece, please check out the rest of my work at ImageKind.com.
Thanks!
Friday, February 29, 2008
Let us begin the begin, shall we?
Oh, and I am a flickr-aholic. If you are saying to yourself, "What's a flickr?", well, then I say, "Where have you been?" Hello? Flickr is only the GREATEST and largest photo sharing network on the planet with over 2 BILLION photos! Mom's post pics of their kids & cats on flickr. World renowned photographers post pictures of fashion models. Graphic designers post album covers. Crafters post pictures of their creations, and on and on....You just never know what you will see there.
Let me give flickr "props"...
- You can learn a ton from looking at fellow photographers photos and discussions in the groups.
- You can get feedback on your work which is helpful and can be a real boost to the ol' self-esteem.
- It can provide you with inspiration and motivation. If you get hooked, you will feel compelled to keep creating better pictures so you can share them with your flickr friends.
- You will make flickr friends (AKA "contacts")
- It's great exposure. Your work gets seen by the world. For me, this resulted in receiving requests to purchase my art. This was just the push I needed to start my own business, Kamera Kat Studio.
FYI - If you are interested, much of my work is available as fine art prints.
All photos copyright of Lisa Whipkey
